
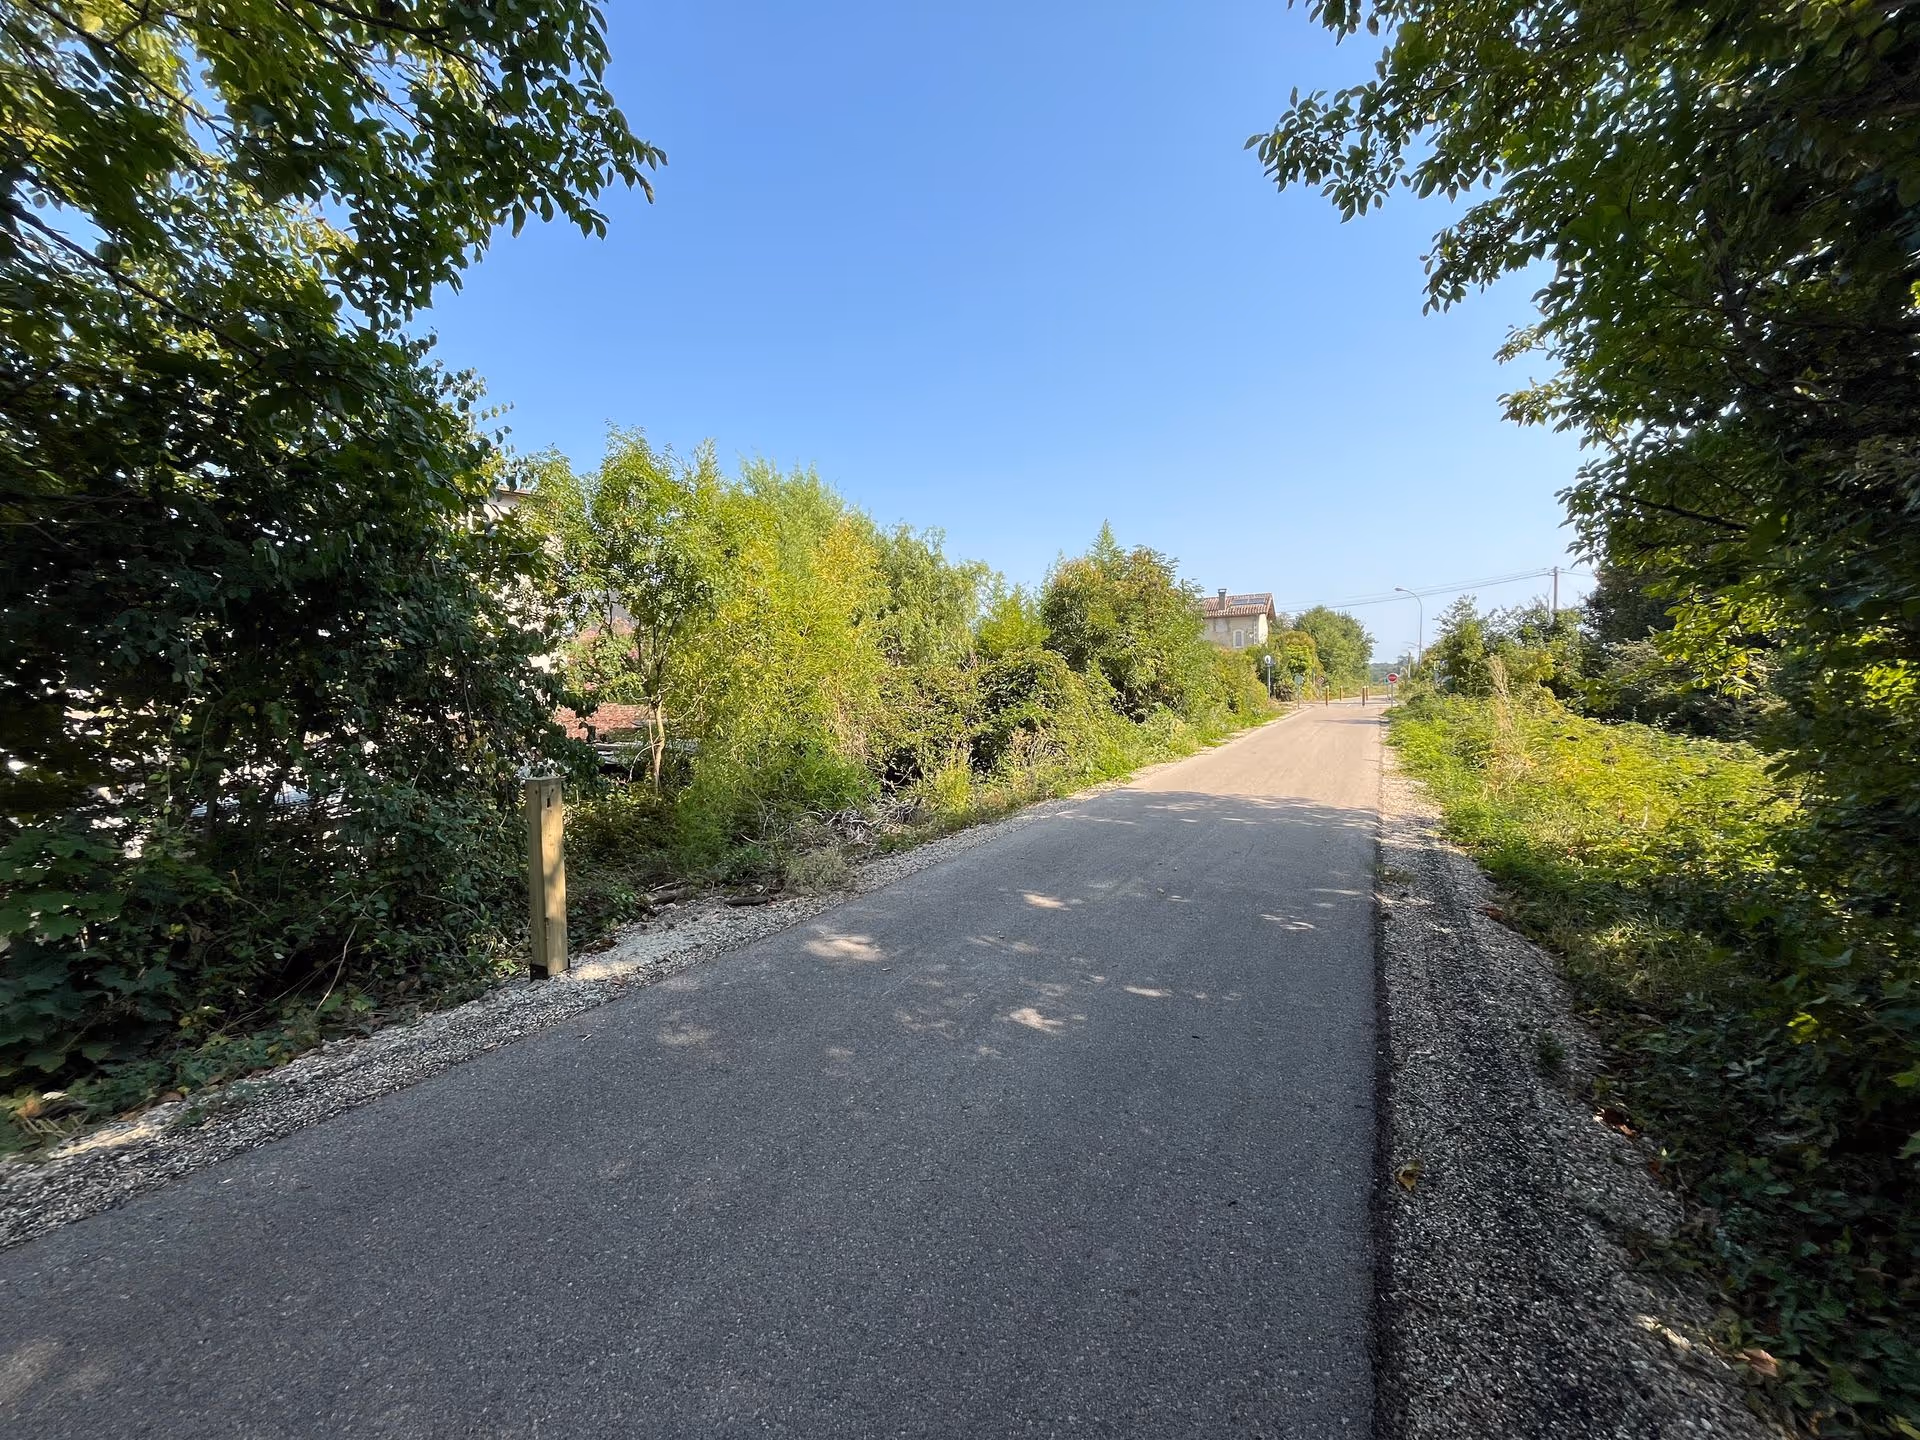
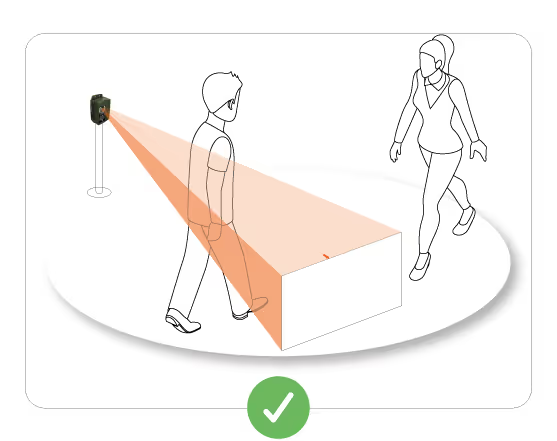
A good count is won by choosing the crossing point. You are looking for a place where the flow is simple, channelled, and representative of the use. Reliability depends above all on three factors: stable trajectories, controlled width, and installation at the right height depending on the type of flow.
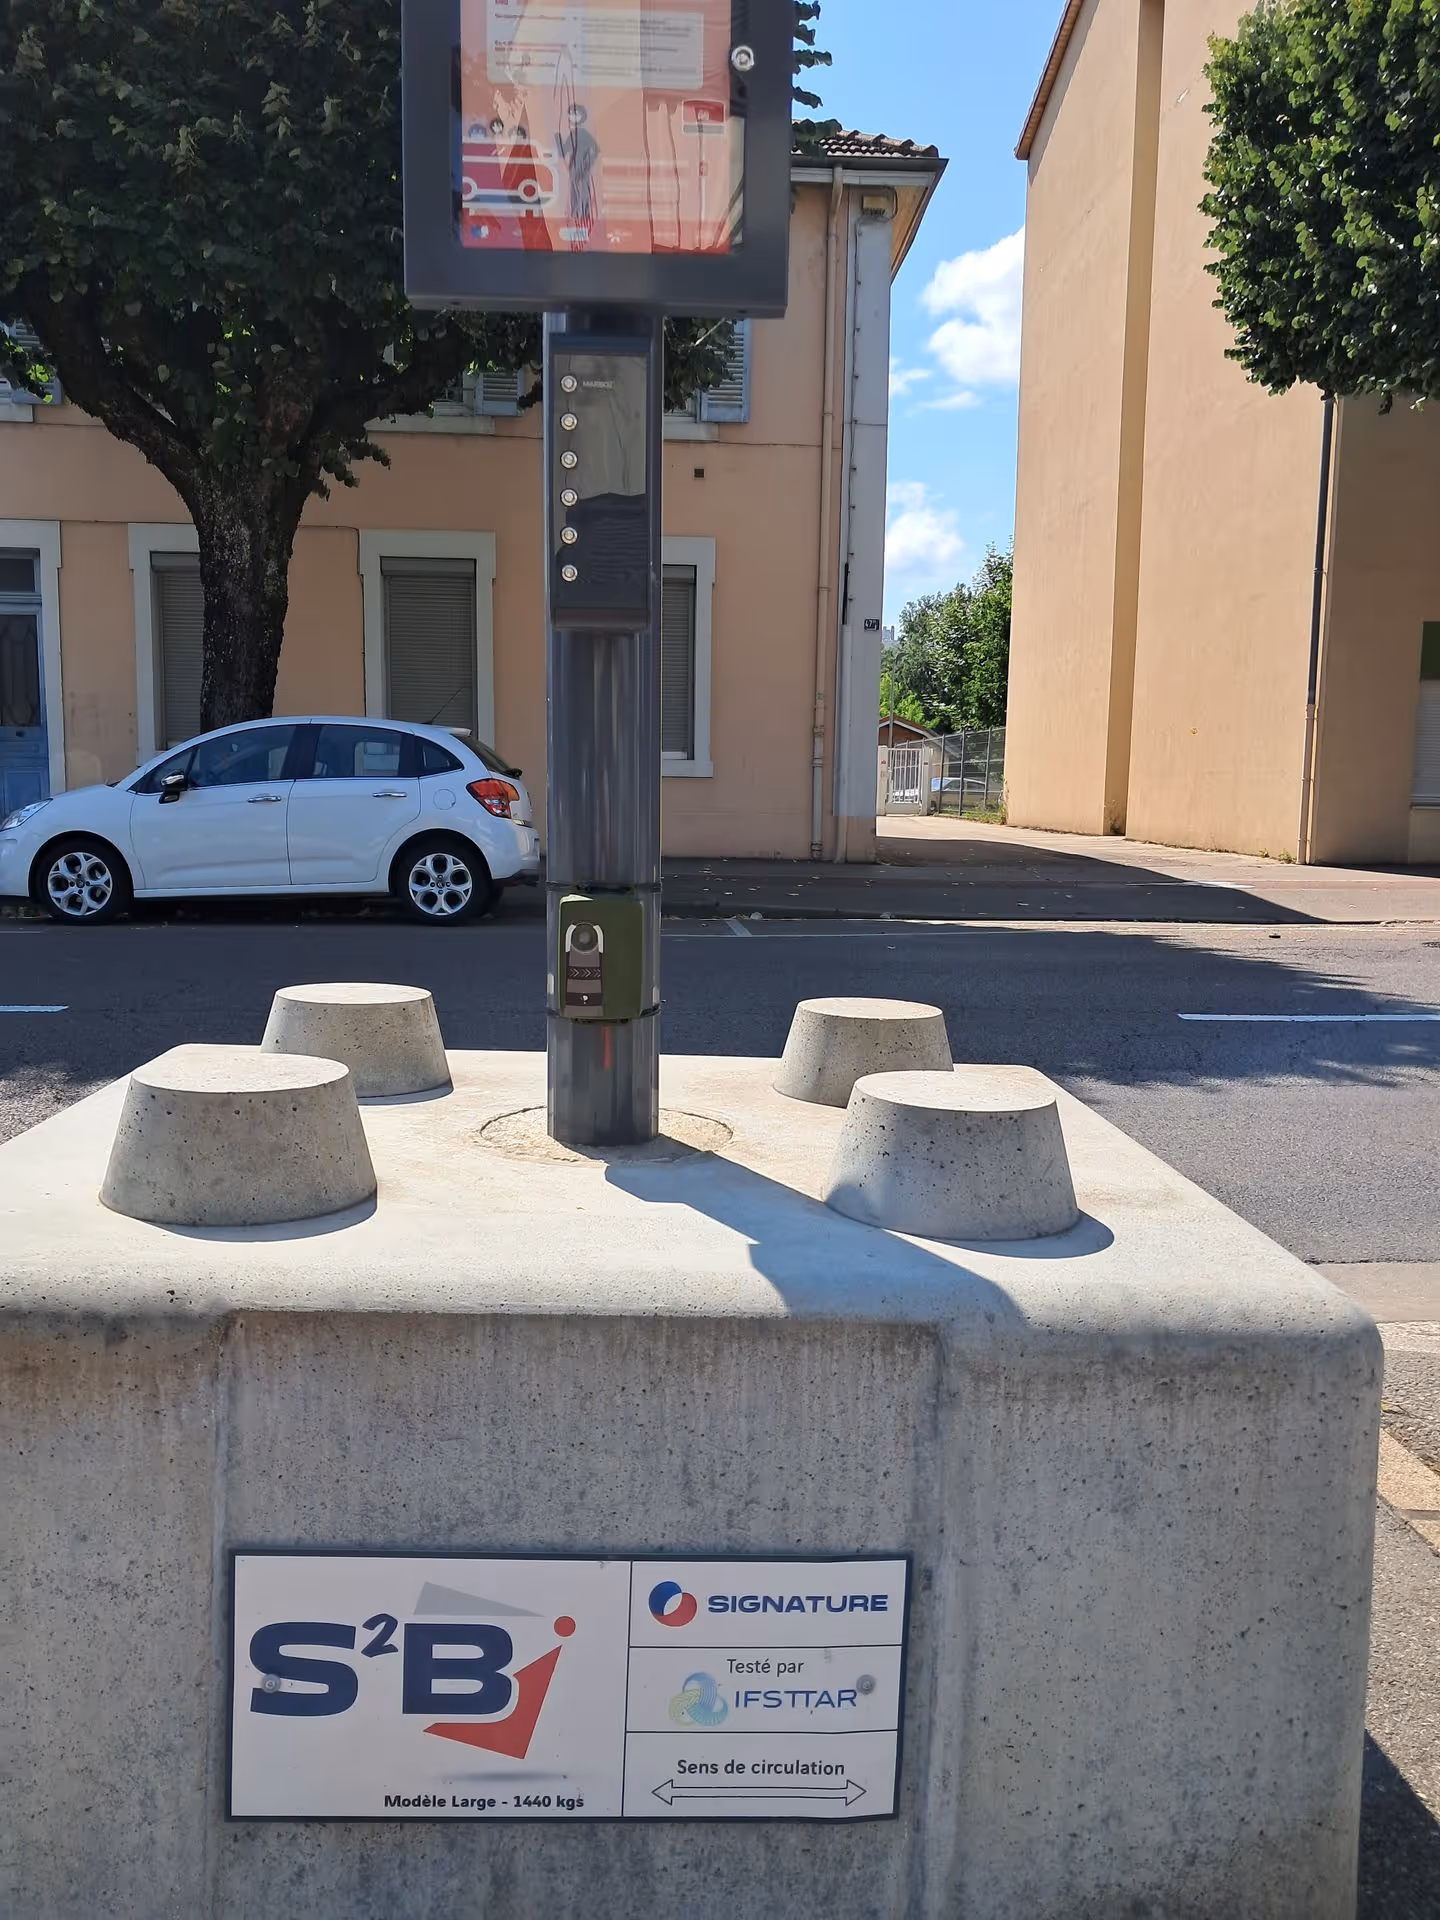
Choose a “mandatory” crossing point, check the width to be covered, decide on the direction (mono/double), pose at the right height (depending on pedestrians/bikes/vehicles), orient towards the crossing area, avoid maneuvering areas and thermally unstable backgrounds.
Most measurement projects fail for a simple reason: we install a meter “where it is easy”, not “where it is measurable”. However, an attendance counter does no magic. If users disperse, stop, cross each other in all directions or pass over an area that is too large, the data loses reliability.
With Verdilo, this is even more true, because you use crossing detection that needs a clear scenario: understandable trajectories, a controlled width of passage, and a positioning consistent with the flow to be measured (pedestrians, bicycles, vehicles).
The objective of this guide is therefore very concrete: to give you a field identification method that works in 90% of cases, then a checklist to secure the installation.
.avif)
This guide is used by all organizations that need to measure flows without turning the site into a construction site: local authorities, managers of natural areas, tourist sites, equipment operators, event organizers, event organizers, mobility operators or car park managers.
It is also useful when you already have an intuition (“we're going to put it in”) but you need to produce defensible data: before-and-after assessment, justification of a grant, seasonal monitoring, seasonal monitoring, gauge management or evaluation of the impact of a development.
Before you even look at the site, ask a simple question: “What number should we be able to comment on?”
A count can be used to measure global usage, compare periods, size services, objectify an impact, or monitor saturation. Depending on the case, the location will not be the same. For example, if you want to measure the use of a park, you prefer the main entrances. If you want to measure the use of a layout, you choose a point that actually “captures” the layout (not a crossroads where people cut off).
With Verdilo, you can count pedestrians, bikes, and vehicles, and configure the direction of passage. This ability is valuable, but only if you have clarified the expected flow and the need for distinction.
The best location is rarely “the most visible.” This is the point where the user has no simple alternative.
Look for:
The more a passage is channelled, the more stable the measurement is over time, and the more reliable your before-and-after comparisons are.
A good crossing point is a point where the user goes through “one movement.”
To avoid if possible:
If you have no choice, go back a few meters to find a more fluid passage, even if it is not “right” at the symbolic location.
Verdilo is designed to rely on a passage width of up to several meters, but the ground rule remains the same: the wider and more scattered it is, the more risks you take.
The right reflex is to choose a place where:
If the space is too open, the best solution is not to “aim wider”, but to move the location to a bottleneck, or to rethink the protocol (for example several points rather than one).
This is a step that is often forgotten, while it determines everything else.
Ask yourself two questions:
The more granularity you want, the more “clean” the waypoint should be. An average location may suffice for an overall volume, but not for a fine and defensible distinction.
The height depends on the main flow targeted.
In practice, the following are generally retained:
The idea is not to be to the nearest centimeter, but to be in the right order of magnitude, and above all to remain consistent with the flow you want to measure and the configuration of the passage.
Verdilo relies on thermal detection. This involves good sense of terrain: look for a stable and homogeneous background behind the passage area, and avoid aiming at sources that may interfere with reading (significant thermal variations, very “hot” nearby objects, surfaces that change a lot depending on the time of day).
The positioning must direct the sensor towards the area where users actually pass, without “framing” an unnecessary area.
Many sites are shared spaces (pedestrians + bikes, or pedestrians + vehicles on an access). Verdilo can cover these cases, but your choice of location should limit confusion.
If the modes mix in a chaotic manner, you will have a less clean result. In this case, choose a point where the trajectories separate naturally (marking on the ground, chicane, parking entrance, start of the track).
Verdilo can transmit data at a more or less regular frequency. The more finely you want to “pilot” (peaks, operation during the day), the more frequent transmission you will benefit from. If you are in an observatory (week/monthly report), a more spaced transmission is sufficient.
The important point: the transmission frequency must be decided with use, because it impacts autonomy. Don't ask for “the maximum” by default; ask what really serves your decision.
Correction: look for a real bottleneck, even if it means being less “central”. The data will be more usable.
Correction: go back a few meters to find a crossing flow.
Correction: either simplify the objective (global volume), or move the location to a cleaner passage, or instrument several points.
Fix: map accesses. If you are only measuring part of the flow, assume it and write it down in the balance sheet. If not, instrument the main accesses.
Correction: decide if you are in control (finer frequency) or in an observatory (more spaced frequency), and configure accordingly.
An attendance counter is a decision-making tool. The quality of your project depends above all on the choice of the crossing point and on the coherence between objective, location, direction, width and installation height.
If you want, you can send us two or three photos of your site (or a map with the accesses). In a few questions, we help you validate the most robust location and the most suitable Verdilo configuration.


.svg)


.avif)

